Friday, July 13, 2007


http://www.simpsonsmovie.com/main.html
Me as a Simpsons avatar!
Posted by Picasa

Tuesday, July 03, 2007

Solidworks Overmold Technique:
Today I will share a really cool method for designing overmold. I had been using a pretty intense method of offseting surfaces in and out and knitting them together with a bridging surface (most likely a trimmed surface extrude) This method is a little more stable because it relies on more Solid features, which tend to have less problems with relationships.


So this is your generic main body

Extrude the profile of your overmold without merging the feature

Offset the orange surfaces out by 0.5mm (It is hard to see it here)
Posted by Picasa

Cut the overmold profile extrude with the offset surfaces

Hide the large body and the surface offset. This makes it a little easier to deal with the many bodies

So now you only have the overmold bodies

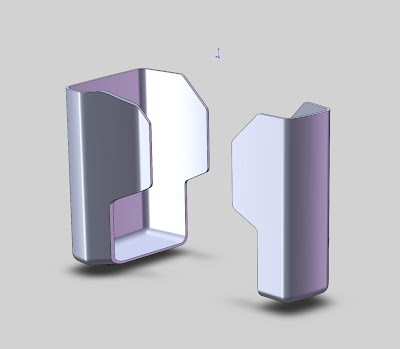
In this case Shell the first overmold body1.2mm
Posted by Picasa

Shell the second overmold body.


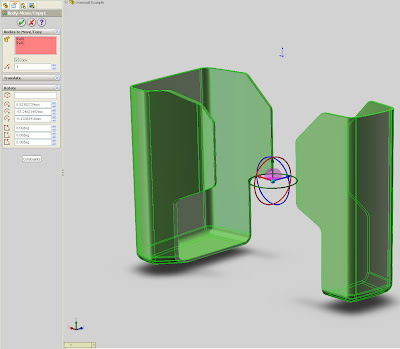
Make a copy of both bodies with the Move/Copy feature.
Dont specify any movement or rotation. Just check Copy

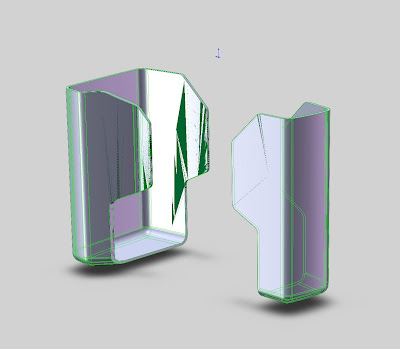
This is what it should like when you pick any of those copies.


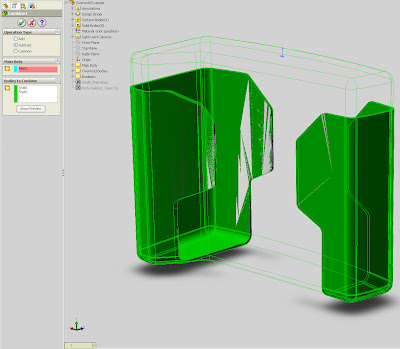
Now use the Combine feature to subtract (yeah-real intuitive isnt it?) the overmold bodies from the main body.
Posted by Picasa

This is the body after the combine operation. The overmold bodies are subtracted from the main volume.
Note that this command consumes the overmold bodies that were used in the Combine feature.

Use the move face command to create the reveal line between the overmold and the orange plastic. This reveal line prevents the formation of flash and covers over any slight misalignment. They also serve to outline the overmold area graphically.

Show the copied overmold bodies. Nice!

Note that the shell of the main body now maintains uniform wall thickness. This prevents part warpage.
Posted by Picasa